Link2SD usage
This article requires some technical knowledge, your phone must be root.
If you did not root the device, search the Internet for how to get root for your device.
This error means that the /data/ section does not have enough space to install new applications.
The /data/ section in Android contains all applications installed in the internal memory.
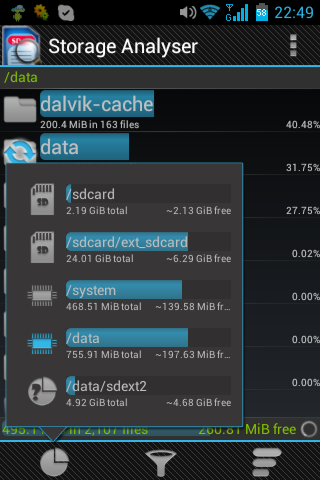
Storage Analyzer will help to visually see how much space is occupied in which section and left.
 Free app.
Link to it (no longer available on android play):
https://play.google.com/store/apps/details?id=com.levelokment.storageanalyser
Allows you to see what sections are inside your phone and evaluate their disposal.
Local copy of the official, free app with its MD5 amount:
After starting, go to the program settings, then Expert Options, check the Show system partitions there and if your phone is rutted, then Use su rights.
Here is a description of the main sections that interest us.
 Free app.
Link to app
https://play.google.com/store/apps/details?id=com.advancedprocessmanager
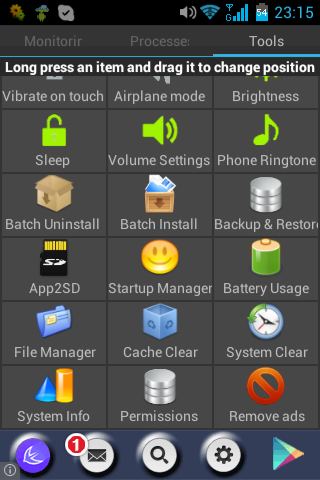
Very useful utility with a lot of system functions.
We are interested in one of the functions called Cache Clear.
This function clears all cache directories of all applications.
These directories are also located in /data/, namely, in
/data/data/..[application directory]../cache/.
Use this function,
it will delete part of the data from the /data/ section (it will clear the cache)
and you may be able to install new applications without additional troubles.
 Free app.
Link to App:
https://play.google.com/store/apps/details?id=com.icecoldapps.sshserver
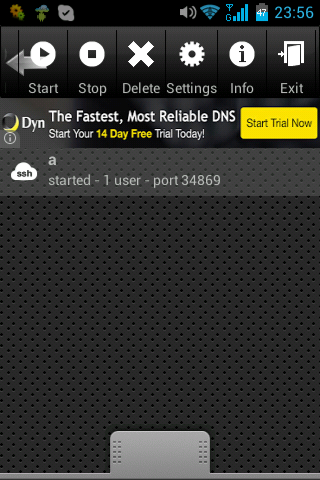
You can access your phone like any other LInux system.
If your phone is root, then an application such as BusyBox is already installed.
BusyBox gives you the ability to work on your phone as a Linux system.
You can connect and edit, copy, move files, execute any Linux commands.
You can connect the console from Windows to your phone using the PuTTY program.
You can also view and copy non-root files using the SCP protocol when using WinSCP under Windows.
 Free app.
Link to App:
https://play.google.com/store/apps/details?id=com.buak.Link2SD
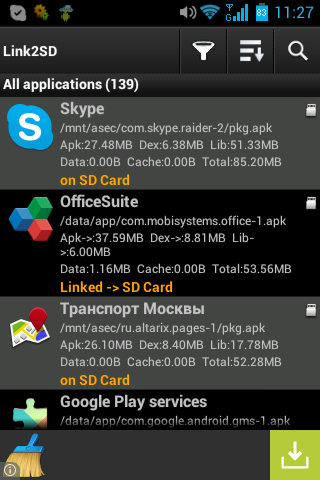
The program allows you to transfer the .apk file from /data/app/ and .dex from /data/dalvik-cache/ to the partition on the external SD memory card.
To prepare the section on an external SD card, read below.
If you did not root the device, search the Internet for how to get root for your device.
insufficient storage available
This is the main error in android that we will try to get around.This error means that the /data/ section does not have enough space to install new applications.
The /data/ section in Android contains all applications installed in the internal memory.
Storage Analyzer will help to visually see how much space is occupied in which section and left.
Storage Analyzer

 Free app.
Link to it (no longer available on android play):
https://play.google.com/store/apps/details?id=com.levelokment.storageanalyser
Allows you to see what sections are inside your phone and evaluate their disposal.
Local copy of the official, free app with its MD5 amount:
6e1c78e09b6716cab7fce5da7fdff175 Storage Analyser 0.9.9_50.apkStorage Analyzer supports both rooted devices and non-rooted devices, allowing you to browse any partitions.
After starting, go to the program settings, then Expert Options, check the Show system partitions there and if your phone is rutted, then Use su rights.
Here is a description of the main sections that interest us.
Android internal memory
/data/
This section contains all the applications installed in the internal memory of the phone.
Also, this section stores application data transferred to the memory card using the regular means of the phone (function app2sd).
This and only this section of the phone is encrypted if you encrypt your entire phone, protecting it with a password / pin code.
Also, this section stores application data transferred to the memory card using the regular means of the phone (function app2sd).
This and only this section of the phone is encrypted if you encrypt your entire phone, protecting it with a password / pin code.
/data/app/
This section contains the original application images, the so-called .apk files installed from google play.

/data/data/
On this section, each installed application has its own subdirectory, where all applications store their data necessary for them to work.
/data/dalvik-cache/
Here are the original images of installed applications converted by Android.
All .apk files from the /data/app/ section are converted.
The converted files have the suffix (extension) .dex.
Android can work with the .dex format much faster than with the .apk.
.dex files are slightly larger or slightly smaller than the original .apk.
They live and update on the phone all the time while the application is installed.
How much space is needed to install a new application
The size of the application from the Android Market is the size of the .apk file.
About the same amount (size .apk) in the phone will take a .dex file.
And another size will take a temporary directory at the time of application installation.
So at the peak, when installing the application you will need a triple size.
After installation, the application will occupy a little more than double size.

Assistant for Android
 Free app.
Link to app
https://play.google.com/store/apps/details?id=com.advancedprocessmanager
Very useful utility with a lot of system functions.
We are interested in one of the functions called Cache Clear.
This function clears all cache directories of all applications.
These directories are also located in /data/, namely, in
/data/data/..[application directory]../cache/.
Use this function,
it will delete part of the data from the /data/ section (it will clear the cache)
and you may be able to install new applications without additional troubles.

Total Commander
Free app.
Link to App:
https://play.google.com/store/apps/details?id=com.ghisler.android.TotalCommander
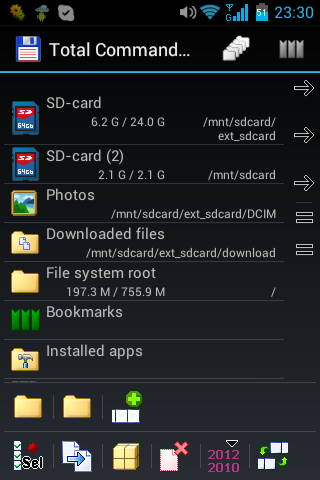
The best file manager allows you to go to directories.
Has the functions of viewing and editing files (you may need).
Supports rooted devices, allowing you to edit any files.
Link to App:
https://play.google.com/store/apps/details?id=com.ghisler.android.TotalCommander
The best file manager allows you to go to directories.
Has the functions of viewing and editing files (you may need).
Supports rooted devices, allowing you to edit any files.
SSH Server
 Free app.
Link to App:
https://play.google.com/store/apps/details?id=com.icecoldapps.sshserver
You can access your phone like any other LInux system.
If your phone is root, then an application such as BusyBox is already installed.
BusyBox gives you the ability to work on your phone as a Linux system.
You can connect and edit, copy, move files, execute any Linux commands.
You can connect the console from Windows to your phone using the PuTTY program.
You can also view and copy non-root files using the SCP protocol when using WinSCP under Windows.
Link2SD

 Free app.
Link to App:
https://play.google.com/store/apps/details?id=com.buak.Link2SD
The program allows you to transfer the .apk file from /data/app/ and .dex from /data/dalvik-cache/ to the partition on the external SD memory card.
To prepare the section on an external SD card, read below.
link2SD package invalid
This error occurs both with unlicensed versions and with new licensed ones.
We recommend link2SD version 2.4.10, without the suffix plus - just the usual free version.
Unfortunately, the Android Market only distributes the latest versions,
We recommend link2SD version 2.4.10, without the suffix plus - just the usual free version.
Unfortunately, the Android Market only distributes the latest versions,
01f36e3edb83951836204e45291f994d Link2SD 2.4.10_144.apk
Internal SD card, and external
Internal SD memory card (internal SD memory) in Android is just an extra section,
on the same memory card as the entire internal memory of the phone.
You cannot remove this “card”; it is soldered inside the case into the PCB of the telephone circuit board.
An external memory card is the memory card you bought and put in the slot under the phone’s battery.
on the same memory card as the entire internal memory of the phone.
You cannot remove this “card”; it is soldered inside the case into the PCB of the telephone circuit board.
An external memory card is the memory card you bought and put in the slot under the phone’s battery.
Partitioning an external SD card
We recommend microSD cards made by Kingston, for example, microSDHC SDC10 / 32GB Class10.
The guys from Transcend are making a massive marriage, and after re-marking the Transcend card, it will no longer be detected.
Insert the card into the card reader.
You need to create two physical partitions on the map, the first FAT32. Second EXT2. Both sections must be reformatted before further use.
By default, only one partition is usually created on maps and this is FAT32.
The link2sd program uses the second, EXT2 section for its needs.
The first section should be exactly FAT32, the second should be EXT2.
You can re-format and format such programs as:
- Partition Magic (Paid).
- MiniTool Partition Wizard Free http://www.partitionwizard.com/download.html
- fdisk (free standard utility for Linux)
Device    Boot     Start       End   Blocks  Id System
/dev/sde1           2048  31459327 15728640   c W95 FAT32 (LBA)
/dev/sde2       31459328  61408127 14974400  83 Linux
Formatting partitions marked on an external SD card
FAT32 (the first section) is better to format by inserting the card into a Windows computer and format using standard OS tools (referring to the section, agreeing to the format offer).
EXT2 (second section) is best formatted by going to the phone SSH, or you can format it using the MiniTool Partition Wizard .
Also, on Linux, it is possible to use mkfs.vfat and mkfs.ext2 but it is better not to use them (they may not work correctly).
EXT2 (second section) is best formatted by going to the phone SSH, or you can format it using the MiniTool Partition Wizard .
Also, on Linux, it is possible to use mkfs.vfat and mkfs.ext2 but it is better not to use them (they may not work correctly).
Problems with EXT2 partition
link2sd may break off using the section you created in the second EXT2 section.
Especially if you formatted it using mkfs.ext2 from your Linux.
You need to reformat this section from inside the phone.
Log in to your phone via SSH:
Remember to run su - after logging in to root, and enable this action on the screen of the phone itself.
Next, we look for our external SD card inside the phone:
Here we tried the name /dev/block/mmcblk0, pay attention to the number zero at the end, this is a zero flash drive.
So, the name of our flash drive is /dev/block/mmcblk1.
We draw attention to the number one at the end, this is the "1st" flash drive.
* If you don’t hit, try substituting the number 2 and so on.
So, the sections on our /dev/block/mmcblk1 will look like this:
/dev/block/mmcblk1p1
and
/dev/block/mmcblk1p2
Especially if you formatted it using mkfs.ext2 from your Linux.
You need to reformat this section from inside the phone.
Log in to your phone via SSH:
homelinux!lhomeuser:~$ ssh sshuser1@192.168.xx.xx -p 33221
sshuser1@192.168.xx.xx's password:
app_127@android:/ $ su -
app_127@android:/ # id
uid=0(root) gid=0(root)
app_127@android:/ #
The port number (in example 33221) and IP are configured \ visible in the ssh server application.
Remember to run su - after logging in to root, and enable this action on the screen of the phone itself.
Next, we look for our external SD card inside the phone:
app_127@android:/ # fdisk -l /dev/block/mmcblk0

Disk /dev/block/mmcblk0: 3909 MB, 3909091328 bytes
255 heads, 63 sectors/track, 475 cylinders
Units = cylinders of 16065 * 512 = 8225280 bytes

              Device Boot      Start         End      Blocks  Id System
/dev/block/mmcblk0p1               1      243330  1954545663+ ee EFI GPT
Partition 1 has different physical/logical beginnings (non-Linux?):
     phys=(0, 0, 1) logical=(0, 0, 2)
Partition 1 has different physical/logical endings:
     phys=(1023, 254, 63) logical=(243329, 173, 44)
We look at the size, and it’s not that, it’s the internal SD card of the phone - it is only 4GB. Here we tried the name /dev/block/mmcblk0, pay attention to the number zero at the end, this is a zero flash drive.
app_127@android:/ # fdisk -l /dev/block/mmcblk1
Disk /dev/block/mmcblk1: 31.1 GB, 31167873024 bytes
4 heads, 16 sectors/track, 951168 cylinders
Units = cylinders of 64 * 512 = 32768 bytes

              Device Boot      Start         End      Blocks  Id System
/dev/block/mmcblk1p1              33      787328    25193472   c Win95 FAT32 (LBA)
Partition 1 does not end on cylinder boundary
/dev/block/mmcblk1p2          787329      951168     5242880  83 Linux
Partition 2 does not end on cylinder boundary
And here it is, two partitions and 32GB. So, the name of our flash drive is /dev/block/mmcblk1.
We draw attention to the number one at the end, this is the "1st" flash drive.
* If you don’t hit, try substituting the number 2 and so on.
So, the sections on our /dev/block/mmcblk1 will look like this:
/dev/block/mmcblk1p1
and
/dev/block/mmcblk1p2
Format EXT2 partition (second) from inside the phone
Checking numbers in mmcblkXpX before executing a command!
130|app_127@android:/ # mkfs.ext2 /dev/block/mmcblkXpX
Primary mount of a formatted EXT2 partition
You need to do this to verify. If mounted, link2sd will be able to use this partition.
Before mounting, we create a directory in which we will mount, this is /data/sdext2,
this directory is always used by link2sd.
If you have previously run link2sd, then this directory may already exist, this is normal.
Checking numbers in mmcblkXpX before executing a command!
Before mounting, we create a directory in which we will mount, this is /data/sdext2,
this directory is always used by link2sd.
If you have previously run link2sd, then this directory may already exist, this is normal.
Checking numbers in mmcblkXpX before executing a command!
130|app_127@android:/ # mkdir /data/sdext2
130|app_127@android:/ # mount -t ext2 -o rw /dev/block/mmcblkXpX /data/sdext2
130|app_127@android:/ #
There shouldn't be any errors after the mount command, as in the example above.
Automation of mounting of the second EXT2 partition
If you installed the most extreme version of link2fs, then the first time it starts, it will find the second section, try to format it and modify your system so that it can mount this section at system startup.
However, sometimes something may go wrong, for example, after rebooting the phone, the partition is not mounted automatically, it will be visible in StorageAnalyzer, there will either be a section /data/sdext2 or not.
If not, you can try adding the mount string from the example above at the very end of the /system/etc/install-recovery.sh file, if you have such a file.
You can modify this file through the console using the text editor vi,
either via Total Commander. Be careful later, and backup the file before you plan to modify it!
However, sometimes something may go wrong, for example, after rebooting the phone, the partition is not mounted automatically, it will be visible in StorageAnalyzer, there will either be a section /data/sdext2 or not.
If not, you can try adding the mount string from the example above at the very end of the /system/etc/install-recovery.sh file, if you have such a file.
app_127@android:/ # cat /system/etc/install-recovery.sh
#!/system/bin/sh
if ! applypatch -c EMMC:/dev/block/platform/sdhci.1/by-name/recovery:4898816:0c1e3a33dc00e23e10ce9e7bb790dcf6f183ef13; then
  log -t recovery "Installing new recovery image"
  applypatch EMMC:/dev/block/platform/sdhci.1/by-name/boot:4564992:fd14ca4fc49482e6b419d2120acb320328464383 EMMC:/dev/block/platform/sdhci.1/by-name/recovery 0c1e3a33dc00e23e10ce9e7bb790dcf6f183ef13 4898816 fd14ca
4fc49482e6b419d2120acb320328464383:/system/recovery-from-boot.p
else
  log -t recovery "Recovery image already installed"
fi

mount -t ext2 -o rw /dev/block/mmcblk1p2 /data/sdext2
app_127@android:/ #
The contents of this file may be different than what is shown in the example above, you should not spoil or remove your original contents, just append the command to the end of the file.
You can modify this file through the console using the text editor vi,
either via Total Commander. Be careful later, and backup the file before you plan to modify it!
Backups and Recovery Clockwork Mod (CVM)
Once you have rutted your phone, it’s best to install an alternative CVM on it and make a full backup of the system.
And also check that the recovery from this backup goes as you expect, that is - it works.
And also check that the recovery from this backup goes as you expect, that is - it works.
Auto start Android application
You can prevent any application from starting when Android starts.
To do this in the file:
you can edit it using the text editor vi or any other.
You need to find your application by its package name, it can be seen in Link2SD in the application information.
And remove this permission from there:
By setting this permission, you can force any application to load when Android starts.
To modify the packages.xml file, the phone must be root.
We strongly recommend that you make a copy of the file before editing.
If it’s inconvenient for you to climb into a file with your hands, you can use an application like
Startup Manager ( https://play.google.com/store/apps/details?id=imoblife.startupmanager ).
to control the startup.
To do this in the file:
/data/system/packages.xmlGenerally speaking, it is a simple structured XML file,
you can edit it using the text editor vi or any other.
You need to find your application by its package name, it can be seen in Link2SD in the application information.
And remove this permission from there:
<package name="com.news.rssfeedreader" ....
...
<perms>
...
<item name="android.permission.RECEIVE_BOOT_COMPLETED" />
...
</perms>
</package>
When you again need to return the application the ability to boot with the start of Android'a - return permission.
By setting this permission, you can force any application to load when Android starts.
To modify the packages.xml file, the phone must be root.
We strongly recommend that you make a copy of the file before editing.
If it’s inconvenient for you to climb into a file with your hands, you can use an application like
Startup Manager ( https://play.google.com/store/apps/details?id=imoblife.startupmanager ).
to control the startup.
Changing information about an Android device
For can edit file:
After changes, the device should be rebooted.
/system/build.prop
root@MFLogin3:/system # grep -E 'ro.product|ro.build.finger|ro.build.desc' /system/build.prop
ro.product.model=MegaFon Login 3
ro.product.brand=MegaFon
ro.product.name=MFLogin3
ro.product.device=MFLogin3
ro.product.board=MegaFon
ro.product.cpu.abi=armeabi-v7a
ro.product.cpu.abi2=armeabi
ro.product.manufacturer=Foxda
ro.product.locale.language=ru
ro.product.locale.region=RU
ro.build.description=MegaFon-user 4.4.2 KOT49H eng.builder2011.20141224.024126 release-keys
ro.build.fingerprint=MegaFon/MFLogin3/MFLogin3:4.4.2/KOT49H/20141224.024126:user/release-keys
Hint on how to choose another region:
ro.product.locale.language=en
ro.product.locale.region=US
Here are some things NOT to be changed:
root@MFLogin3:/ # grep -E 'ro.build.version.sdk|ro.build.version.release' /system/build.prop
ro.build.version.sdk=19
ro.build.version.release=4.4.2
ro.build.fingerprint Must be changed along with the rest of the variables.Make a backup build.prop to the USB flash drive before changing anything there.
Check all the data from the ro.build.fingerprint variable for build.prop elsewhere.
Also, you need to check /default.prop for what will be replaced from the initramfs system image
to the root partition at the next boot.
After changes, the device should be rebooted.
System UIDs Inconsistent
UIDs on the system are inconsistent, you need to wipe your data partition or your device will be unstable.You need to REinstall the programs listed in /data/system/uiderrors.txt.